|
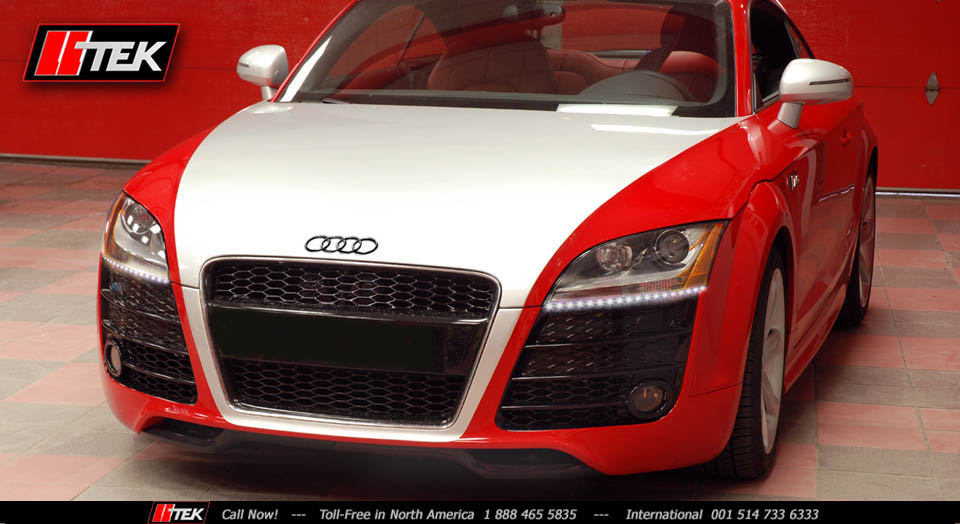
 For those Audi enthusiasts who do not want to change their headlight or cannot change their headlight for whatever the reason, here is an easy and excellent way to give your car the current Audi LED look --- and for all of one dollar. For those Audi enthusiasts who do not want to change their headlight or cannot change their headlight for whatever the reason, here is an easy and excellent way to give your car the current Audi LED look --- and for all of one dollar.
A) Understanding the Product
Big product in a small package. When applied and installed the end result produces an array of bright DRL (Daytime Running Light) that is powerful and updates the look of any Audi car including Q5 and Q7. There are 24 LED lights per strip spaced one (1) inch (2.54 cm) apart. The strip is very thin and has a peel and stick 3M backing. It�s flexible, weather resistant and very durable.
B) What do you get?
There are two (2) 60 cm (23 inches) strips in each kit. There is a left and a right hand version of the strip. Depending on the car model and headlight, the strip is installed underneath the headlight yet can also be turned upward to run up the side of the headlight which is similar to many newer Audi headlights. You become the creative person and you decide on the look you want.
C) Create your design
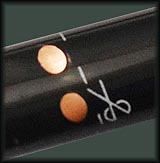
Before you install, look at your headlight carefully and determine the LED look you want to achieve. The 23 inch (60 cm) LED can be cut to length to obtain the final look you want. However, you cannot just cut anywhere you want. Special cut lines are clearly marked on the LED strip. Cut only on the identified cut lines and work your design accordingly. Cut lines are approximately 2 inches (5 cm) apart. Factor the cut line in when creating your design and after you have examined your headlight, its fitment and how it�s integrated into the front of the car.
D) How to install
The product is very thin and flexible so a right angle turn up the side of a headlight (inside corner or outside) is very easy to do as long as the edge is smooth and uniform. In some cases it�s best to remove the headlight. However in most cases you simply need to loosen the headlight and then pull it outward by about an inch. Use a damp cloth to wipe the surface area under the light where you will be applying the LED strip to ensure proper adhesion. A test fit of your design before you remove the peel and stick backing is advised. You can even check the LED look in the �on� position using a small battery. Plan your electrical connection and decision in advance. After you partially remove the backing, attach the non electrical end at its starting point and press into place. The outward facing leading edge of the LED must be flush with the headlight edge or even fractionally recessed. You should not feel the edge of the LED when your hand passes over the headlight face after the product has been installed.
What is the best method for installation?
 Tie-wraps (plastic self-locking fasteners), are very handy and durable and will be useful in many installations, but each LED strip comes out of the box with double-sided peel away adhesive mounting tape. Tie-wraps (plastic self-locking fasteners), are very handy and durable and will be useful in many installations, but each LED strip comes out of the box with double-sided peel away adhesive mounting tape.
After you have cut - what about exposure to the elements?
Only cut with scissors on the lines clearly marked with a small icon. The plastic surrounding the electrical wire is already weather resistant, but to to be absolutely sure and waterproof, LLTeK�s R&D chief strongly recommended a bead of silicon sealant.
E) Electrical Connections
At the end of each electrical LED strip you will see 2 bared wires. The red wire is your power wire. The black wire is your ground/earth wire. The two wires are about 10 inches long. You can shorten the wire. However, do not shorten below the mini resistor which is approximately 3 inches away from the last LED. The resistor is very small yet visible only if you look for it. You can easily lengthen the wires by splicing in two new wires should you decide to do so. Good news � the circuit per LED side draws less than 0.15 amps. Therefore it will not even create an error code if spliced into a low beam wire. If ever spliced into a low or high beam wire with HID, the splice must be on the 12 volt supply wire and not after the HID ballast. Although the power draw is ultra low, in line fusing (not supplied) is advised.
F) How and where do I connect?
There are infinite ways to connect your newly installed headlight LEDs. Here is what we like best. Run the red power wire to �hot� or key on ignition. This means when you start the car, power flows to the LED. When the motor is off, the LEDs go off. Yes, black wire must be connected to a ground (battery ground is always best). Yes, do not forget the fuse on the red wire. You can install an interrupt switch on the red power wire if you want. Alternatively you can hook the red wire into your fog light circuit, your current daytime lights (if you have) or any other controllable circuit. Just make sure that when the motor is turned off, power to the LED is interrupted.
|
